Importing accounts
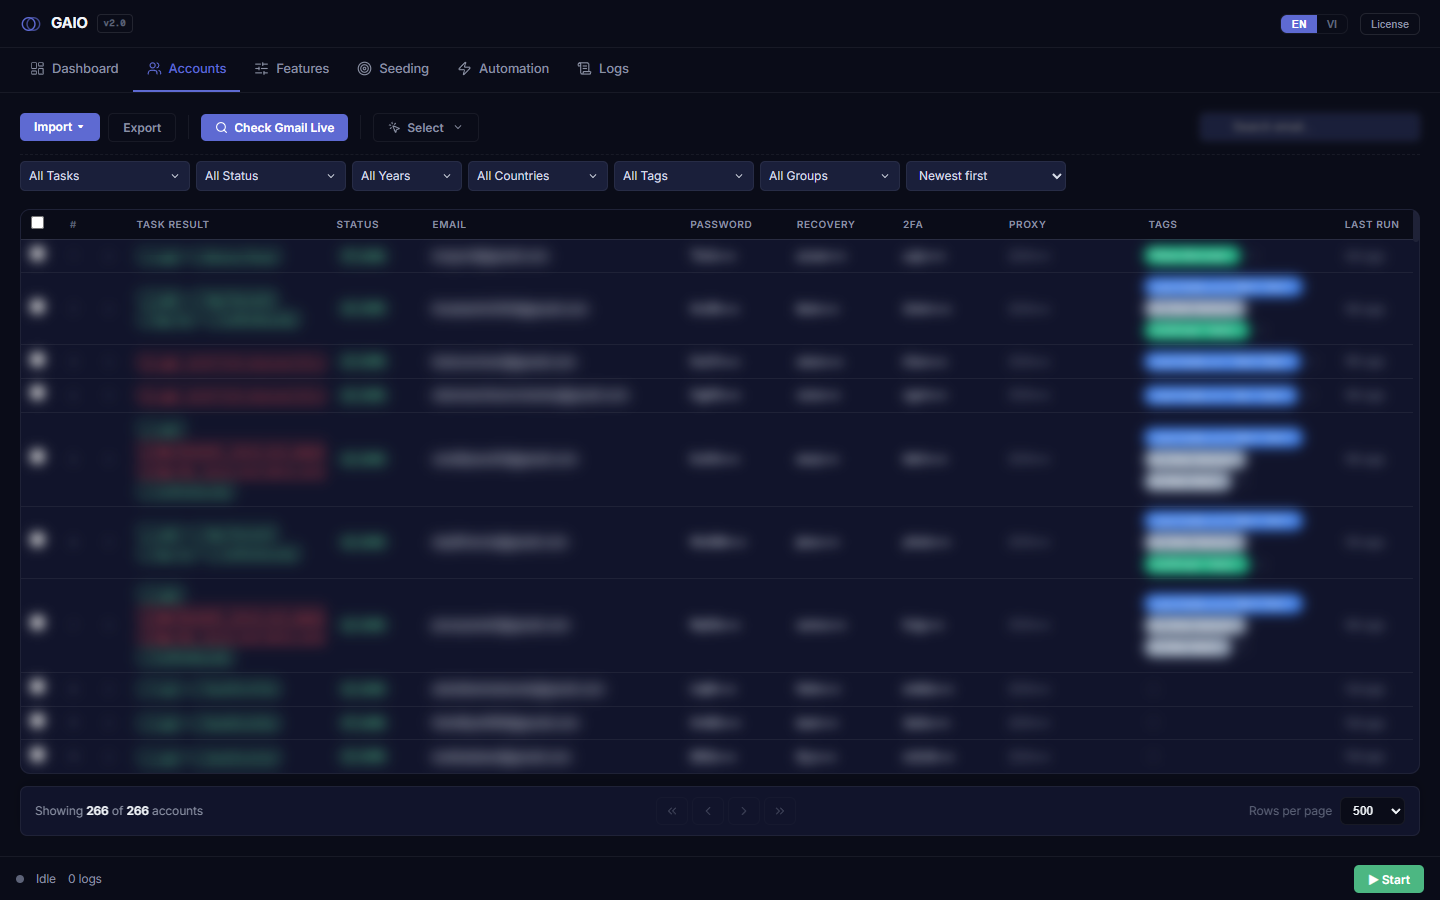
Every way of getting accounts into GAIO starts from the blue Import ▾ button at the top-left of the Accounts tab. Clicking it opens a small menu directly below with three choices: Paste Text, Import Excel File, and Download Template. This menu is a plain toggle — it only closes when you pick an item or click Import ▾ again (it does not close on an outside click).
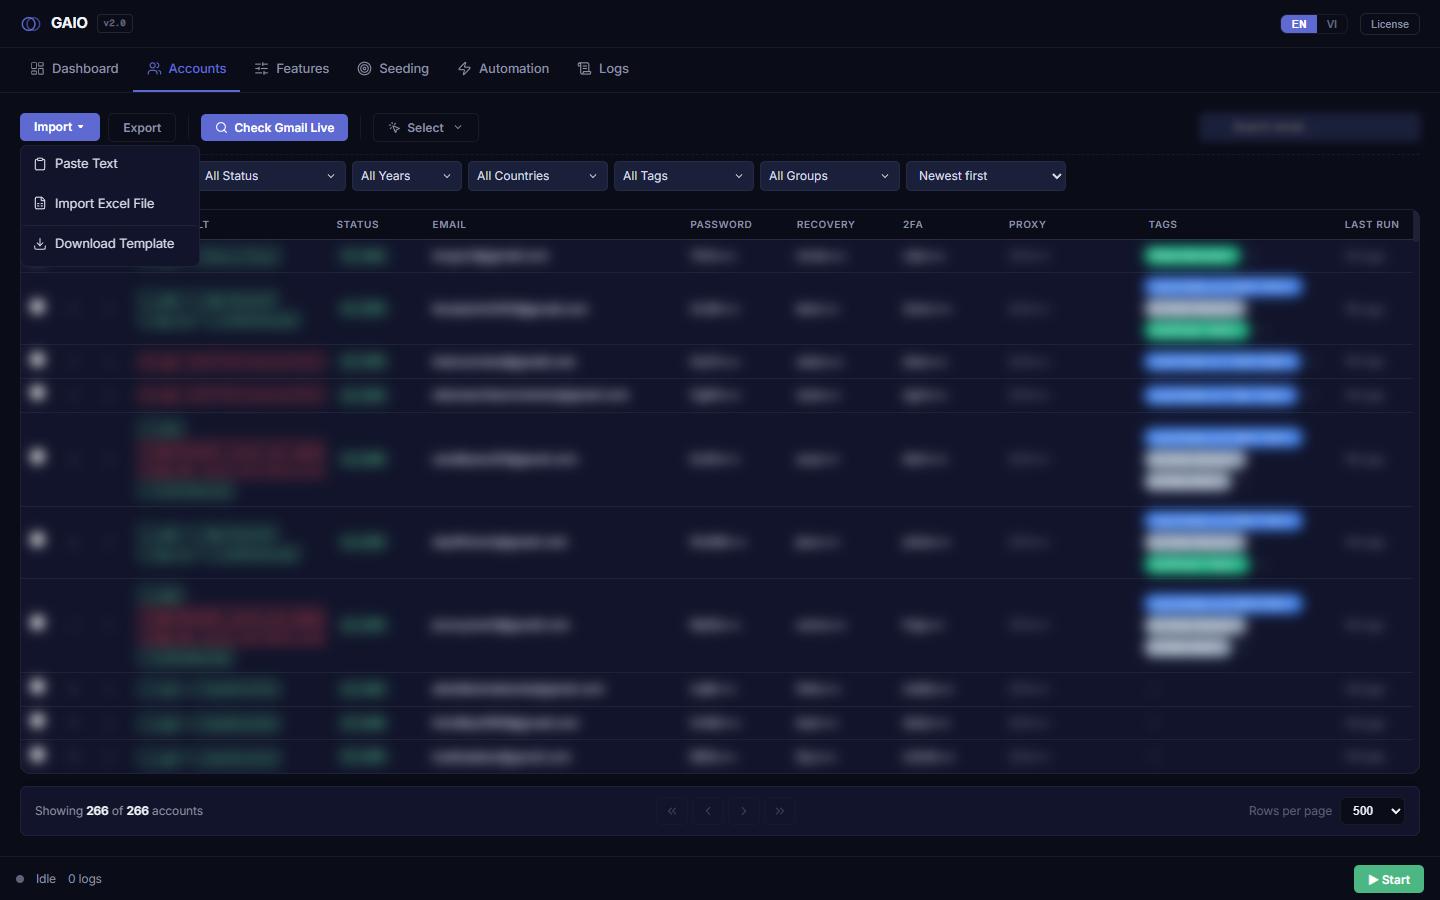
| Menu item | Icon | What it does |
|---|---|---|
| Paste Text | Clipboard | Opens the paste dialog to type/paste many accounts as text. This is the main bulk-entry method. |
| Import Excel File | Spreadsheet | Opens a file picker to load an .xlsx, .xls, or .txt file from disk. |
| Download Template | Download arrow | Asks where to save it with the OS Save As dialog, then writes a blank template file there (this item sits below a divider line). |
Method 1 — Paste Text: the main bulk-entry method
Choose Import → Paste Text to open the Paste Accounts dialog (760px wide). Write one account per line, with columns separated by the pipe character |, a Tab, or a comma — the tool auto-detects it from the first line (so you can paste straight from Excel/Google Sheets, which separate columns with Tab). Example line:
acc01@gmail.com|password123|recovery01@example.com|F6Q5 6RVG 77WL AB2C
Lines that are empty or start with # are treated as comments and ignored.
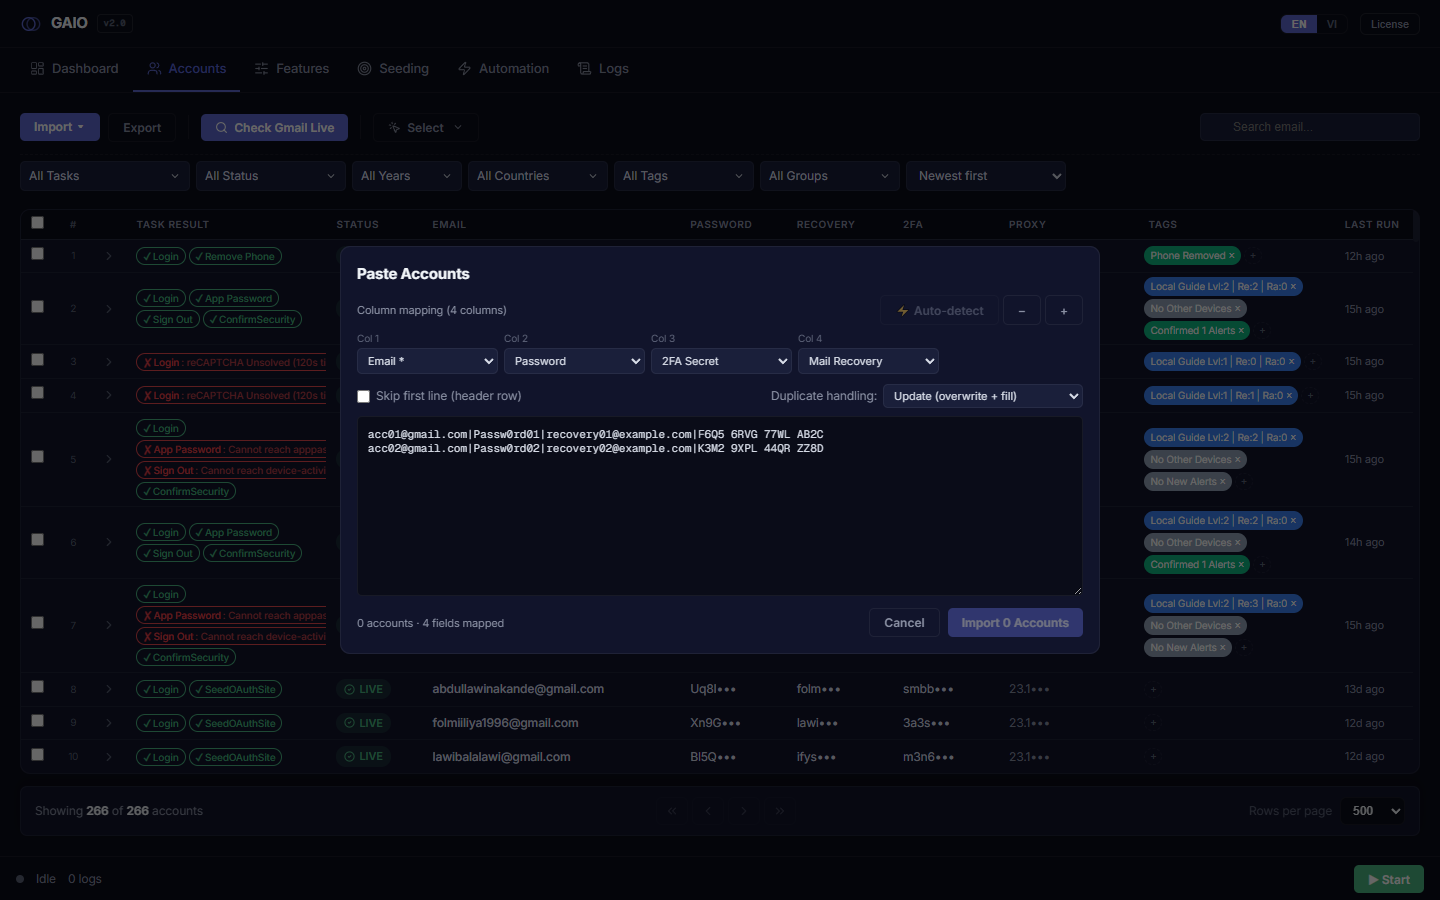
The column-mapping row and the ⚡ Auto-detect button
When you paste, the dialog counts the columns in the first line and guesses a field for each. Every column shows a dropdown (labelled Col 1, Col 2…). The field choices are: Email * (required), Password, Mail Recovery, 2FA Secret, App Password, Proxy, New Password, New Recovery Email, Old Password, Old Recovery Email, 2FA Old, Creation Year, Country, Phone Verified, Status Gmail, Port Type, Status Task, and — Skip column.
- ⚡ Auto-detect — re-runs the field guessing from scratch on the first line (disabled when the text box is empty).
- − / + — remove or add a mapping column by hand (− is disabled when only one column remains).
⚡ Auto-detect only reads one line (the first data line) and never assigns the same field twice. It runs automatically the first time you paste; but once you change any dropdown by hand it stops overriding you (it only pads/truncates columns to match the detected count). The table below shows how each field is recognised:
| Field | Auto-detect recognises it when… |
|---|---|
| Email / Mail Recovery / New Recovery | The first email-looking value → Email; a second email-looking value → Mail Recovery; a third → New Recovery Email; further ones are skipped. |
| Proxy | An IP:port (optionally IP:port:user:pass) or a socks4/socks5/http/https:// URL. |
| 2FA Secret / 2FA Old | Spaced base32 groups (e.g. f6q5 6rvg 77wl) or a compact 16–32-char base32 string; a second such value → 2FA Old. |
| App Password | Exactly 16 lowercase letters with no spaces. |
| Creation Year | A 4-digit year in the range 1990–2030. |
| Country | Matches a built-in list of country names (united states, vietnam, serbia, russia, china, japan, korea, thailand, philippines, indonesia, malaysia, singapore, india, germany, france, uk, canada, australia, brazil, mexico, spain, italy, netherlands, poland, ukraine, turkey…). |
| Phone Verified | An optional + followed by 8–15 digits. |
| Password (fallback) | Any value that matches no pattern: first unmatched → Password, second → Old Password, then anything further → Skip. |
Detection is sensitive to order and format. An App Password is only recognised as 16 lowercase letters with no spaces — if yours contains spaces it will be mis-guessed as a Password. Because each field is assigned at most once, a second email always lands in Mail Recovery even if it wasn't a recovery address. Always eyeball the Preview row 1 strip before importing.
Skip first line, Preview row 1, and the status line
- Skip first line (header row) — tick this if your first line is column titles; it drops line 1 from the import.
- Preview row 1 — a preview strip showing how the first line reads under the current mapping, so you can sanity-check before importing.
- Status line — shows "{lines} accounts · {fields} fields mapped", how many columns are skipped, and a red ⚠ Missing Email column warning if no column is mapped to Email.
Your last column mapping is remembered between sessions (saved as paste-mapping-preset) and reloaded next time — so if all your files share the same column layout, you only need to map once.
The Import button is disabled until at least one column is mapped to Email and there is at least one data line. Otherwise a red Missing Email column warning appears and you cannot click Import.
Duplicate handling — the 4 modes
The Duplicate handling dropdown at the top-right of the dialog decides what happens when a pasted email already exists in the database:
| Mode | Behaviour |
|---|---|
| Update (overwrite + fill) Default | Existing accounts are overwritten and any empty fields are filled in. |
| Skip (keep existing) | Existing accounts are left untouched; only brand-new emails are inserted (the result reports a skipped count). |
| Error (abort if conflict) | If any pasted email already exists, the entire import is aborted and an error is shown. |
| Preview (verify before commit) | Opens the Import Preview modal so you review before committing (see the flow below). |
Error aborts the whole batch on the first conflict — not just the conflicting row, but nothing is imported at all. Use it when you want a hard guarantee that no existing data gets overwritten.
The Preview flow (review the diff, then commit)
- Pick Preview mode — set Duplicate handling to Preview (verify before commit).
- Click
Preview— the tool fetches the diff and opens the Import Preview modal. - Read the two sections — the green section lists New accounts (to be inserted, with checkboxes); the amber section lists Updates, each row showing per-field diffs old→new (old value struck through in red, new value in green). A "{selected} of {total} selected" counter sits on top.
- Tick/untick — choose exactly which new emails and which updates to apply (everything is pre-ticked by default).
- Click
Confirm Import {N}to commit only the still-ticked emails, orBackto return to the paste dialog.
In the Preview modal, every new account and every update starts selected — one careless Confirm applies everything. Untick the rows you don't want first. If nothing changed, the modal shows "No changes — all accounts already up-to-date".
Steps to import via Paste Text
- Open the dialog — choose Import → Paste Text.
- Paste your lines — paste accounts into the large text box, one per line, columns separated by
|. - Check the column mapping — review the dropdown row; fix any wrong guess, or click ⚡ Auto-detect to re-guess from scratch.
- Optional Skip header — tick Skip first line (header row) if your first line is titles.
- Choose duplicate handling — set Duplicate handling (Update / Skip / Error / Preview).
- Check Preview row 1 — confirm the data reads correctly.
- Import — click
Import {N} Accounts(orPreviewif you chose Preview mode).
Method 2 — Import Excel File
Choose Import → Import Excel File to load accounts from a file on disk instead of pasting. The OS file picker accepts only .xlsx, .xls, and .txt. The tool reads by column NAME in the header row (not by position), so you can add, remove, or reorder columns freely — as long as the header names are right. Recognised headers: EMAIL, PASSWORD, RECOVERY MAIL, 2FA SECRET, APP PASSWORD, BACKUP CODES, PROXY, PASS NEW, MAILKP NEW, PASS OLD, MAILKP OLD, 2FA OLD, CREATION YEAR, CREATION COUNTRY, SDT VER OK, STATUS GMAIL (use Download Template to get these ready-made).
Bulk-updating existing accounts: if an email in the file already exists, the tool updates that account — columns with a value are written (overwriting if present), blank columns are left untouched. So you can fill just EMAIL + PASS NEW + MAILKP NEW to update exactly those two columns across many accounts, leaving everything else intact. See the Change password & recovery email chapter for how these columns are used at run time.
- Open — choose Import → Import Excel File.
- Choose the file — in the OS dialog, select an
.xlsx,.xls, or.txtfile. - Wait for load — the tool reads the file, refreshes the table, and shows "Imported {N} accounts".
The file can live anywhere — Downloads, Desktop, another drive: the tool reads the contents of the file you picked rather than looking up a same-named file elsewhere. On failure a plain "Import failed" toast appears with no detail.
Method 3 — Download Template
Choose Import → Download Template to generate a blank template file that shows the exact column order and format the Excel importer expects. The tool first opens your operating system's Save As dialog so you choose the folder and file name yourself (pre-filled with Gmail_Template.xlsx).
- Open — choose Import → Download Template.
- Choose where to save — pick a folder and name in the Save As dialog and confirm. Pressing Cancel creates nothing.
- Confirm — the file is written exactly where you chose and a "Template saved: {path}" toast appears.
- Fill and re-load — open that file, enter your accounts, then use Import → Import Excel File to load it back.
If you're not sure of the column layout, always start with Download Template once to get a correct file, then follow it for later imports. On a generation error the toast shows "Template failed".